Appointment Book
- Ben Baker
- Tutorial
This includes adding, moving and cancelling appointments.
1) Hover over the slot you want to book the family appointment into and left click once to highlight.
2) On the left-hand side click the button ‘Family Appointment’.
3) A popup window with all of the family members will appear. You can unselect any family members that are not attending the appointment by unticking them in the ‘Include’ column.
4) Select the appointment type and duration. The ‘All Booked At Start’ is unavailable unless you amend the practice settings to include this option on family appointments. ‘Staggered’ will book the family in sequential slots. ‘All Booked At Start’ will book one (usually long) slot umbrellaing all family members that attending.
5) Click save, the appointment/appointments will now be in the diary.
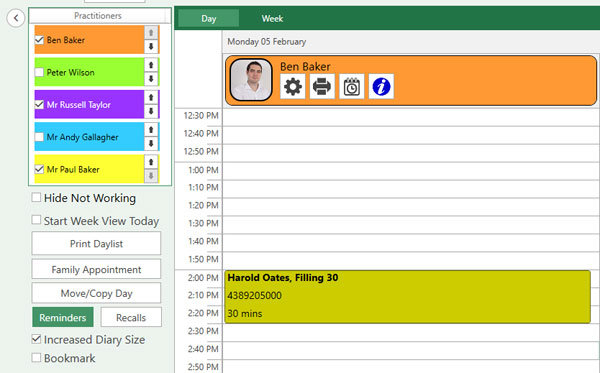
1a) Left click the appointment that needs adjusting and right click. A drop-down menu will appear, go down the list and select ‘Edit’.
The two ways to edit appointments in the diary are:
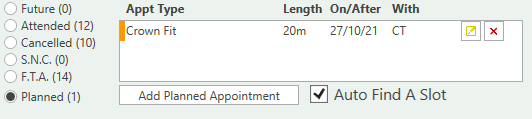
1b) Left click once the appointment that needs adjusting. Once the appointment is highlighted, press the yellow edit button on the bottom left.
or
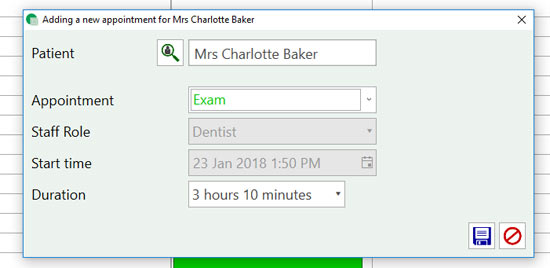
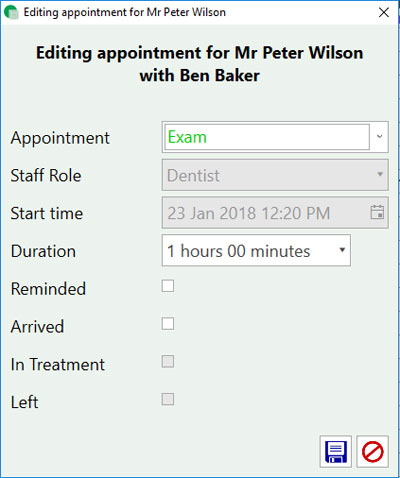
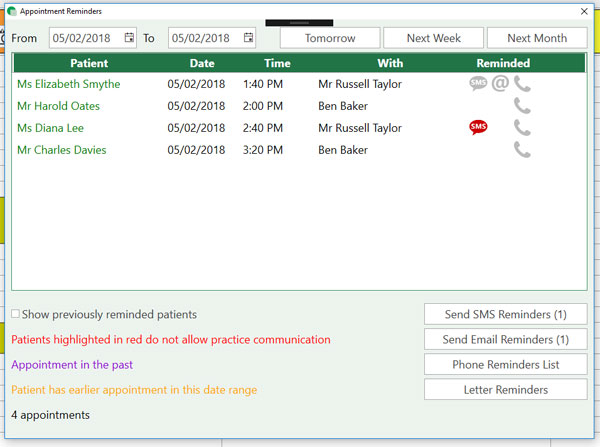
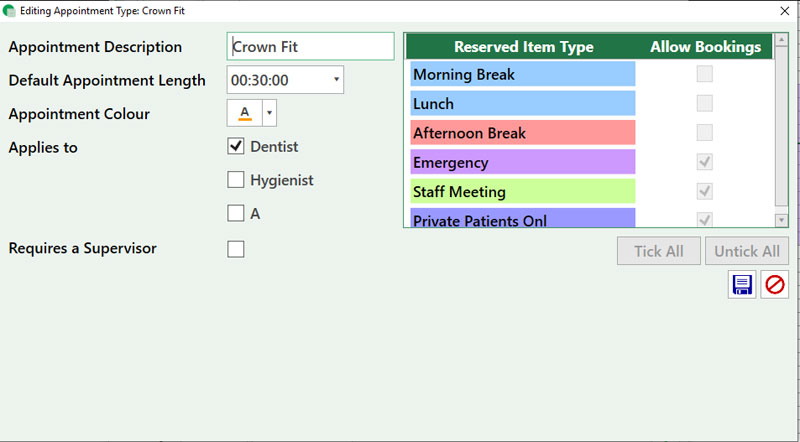
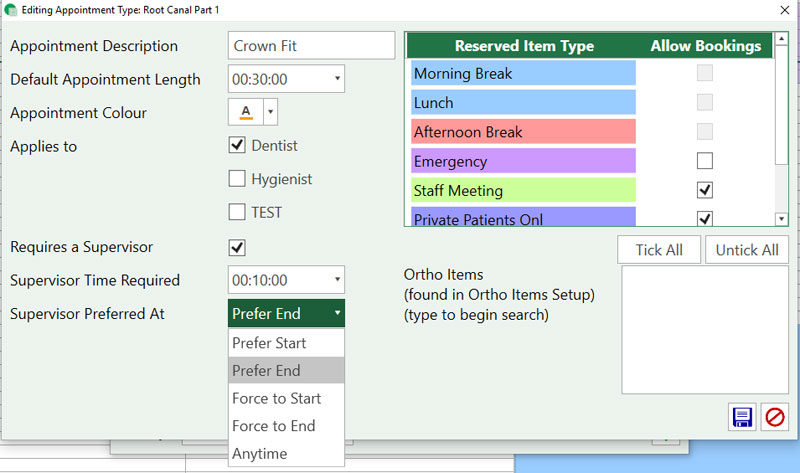
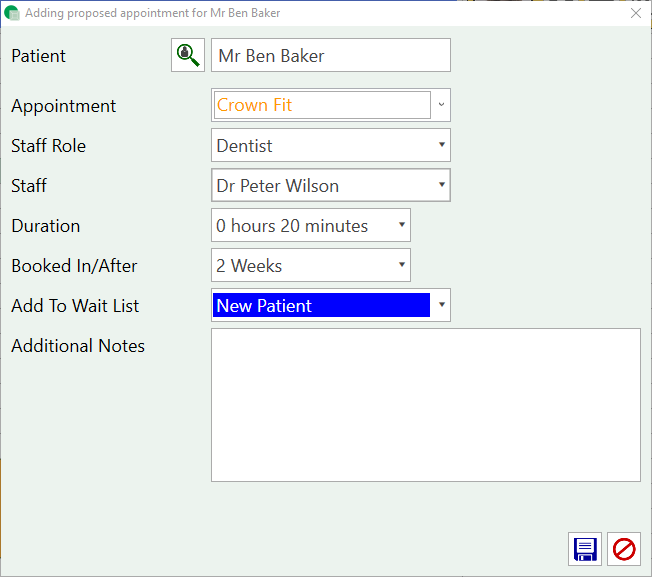
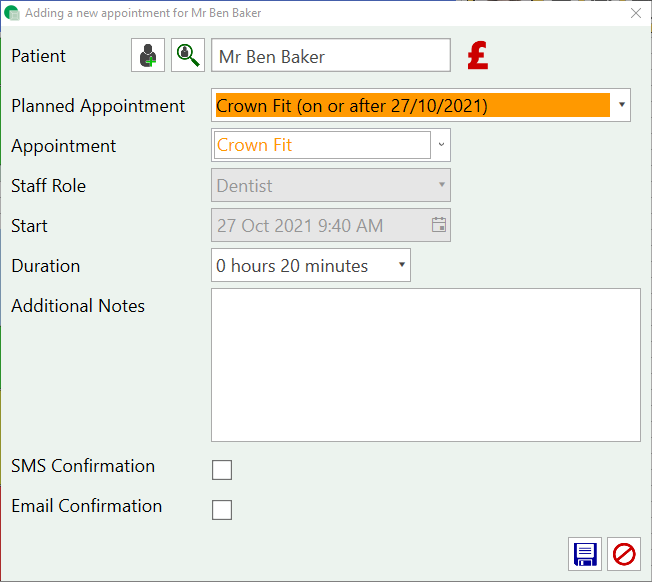
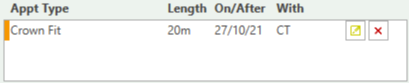
2) A window will pop up with the current information about the appointment.
3) Adjust the appointment to the new desired appointment type, duration and status. Click the save button and your adjustments will show in the appointment book.
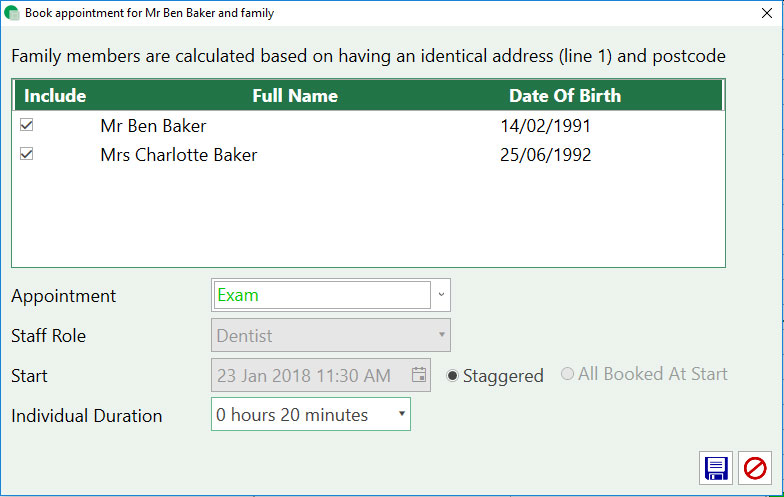
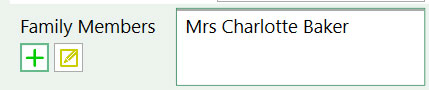
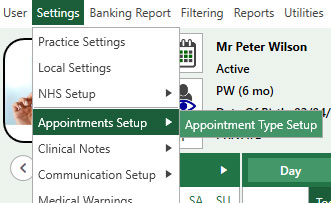
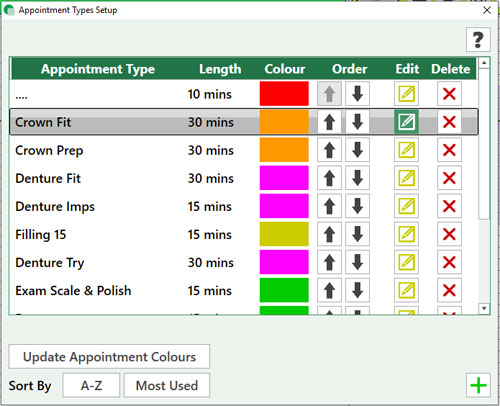
We hope this tutorial has helped with the basics of managing appointments. Go here if you would like to find out how to make Family Appointments or here if you wish to change your Appointment Types.
How to add a family appointment and what the patient record requires for you to do this. If you would like to find out how to add or edit a normal appointment please click here.
1) Hover over the slot you want to book the family appointment into and left click once to highlight.
2) On the left-hand side click the button ‘Family Appointment’.
3) A popup window with all of the family members will appear. You can unselect any family members that are not attending the appointment by unticking them in the ‘Include’ column.
4) Select the appointment type and duration. The ‘All Booked At Start’ is unavailable unless you amend the practice settings to include this option on family appointments. ‘Staggered’ will book the family in sequential slots. ‘All Booked At Start’ will book one (usually long) slot umbrellaing all family members that attending.
5) Click save, the appointment/appointments will now be in the diary.
1) Go to the Patient Record for the first patient.
2) Go to the address information. Make a note of the first line of the address and the postcode.
3) Find the second patient’s record and make sure the first line of their address and their postcode matches that of the first patients. If it doesn’t, amend it to match.
4) This will automatically add them to the family.
1) Find the family member of the patient looking to register, in the patient record.
2) Press the green + and it will automatically fill in the patients surname and address to match their already registered family member.
Edit the Family Members Information
1) Press the yellow edit button.
2) A popup window with the address details, home phone number and mobile number will appear. Amend them to the new details and then click save.
3) This will apply the changes to all members of that family so they are all up to date and remain linked.
Dental recalls can be used to remind patients to book their next check-up or as a prompt to bring in patients that haven’t visited in a long time. They are excellent for keeping on top of your patient’s dental health.
Additionally, patient recalls can be a great marketing tool to increase repeat business and keep your surgeries busy! Once the patient books in, use patient reminders to let them know their appointment date and time -reducing fail to attends (FTAs)!
1) Whilst on the diary, click the Recalls button on the left (you may need to expand the extra options column).
2) Once the recall window opens, you can either select the month for which you want to recall patients for or enter a date range manually. You can then recall patients for Dentist, Hygienist or any other specified person. If you wish to narrow the list down to an individual performer you can do so from the drop-down menu.
3) Once you have calculated the recalls. You are presented with numerous options, these include ‘Send SMS Messages’, ‘Send Emails’, ‘Phone List’, and lastly ‘Letter Recalls’. You can now select the method in which you want to contact your patients.
4) In the Recalled column, you will notice an icon of a phone. This button is used if you phone patients to recall them and by selecting this icon it will remove the patient from the recall list.
5) Whilst the messages are being sent a processing dialog will display. You are free to continue using the system in the background whilst the messages are sent.
6) Once the messages are sent you will have a confirmation to let you know they were sent successfully and how many credits (if sending texts) are left.
Managing reminders including method of reminder notification (SMS, email, mail or telephone call) and reminder period.
1) Whilst on the diary, click the Reminders button on the left. (You may need to expand the extra options column).
2) On the reminder window select the date range you want to remind patients of their appointments for or enter a range manually.
3) To automatically send Texts or Emails simply click the appropriate button.
4) Whilst the messages are being sent a processing dialog will display. You are free to continue using the system in the background whilst the messages are being sent.
5) Once the messages are sent you will have a confirmation to let you know they were sent successfully and how many credits (if sending texts) are left.
6) Ticking the show Previously reminded patients will return patients who have been reminded by any method previously. This allows you to remind patients multiple times or using multiple methods such as texts and emails.
The reminder icons can show various details for each patient.
If an icon is in red the patient does not allow practice communication for that method and won’t be included when sending messages or printing the phone list.
If an icon is black (not greyed out) that means the patient has been previously reminded by this method.
If any of the reminders are purple, this means the appointment is in the past and cannot be reminded for.
If any reminders are orange, this means this patient has another appointment within the selected range and will only be reminded for the first appointment.
How to make a text template. If you’ve already setup the template and want to know how to send the texts go to Sending Recalls, Sending Reminders or Merging Filter List (for sending SMS to a specific group of people).
1) Go to Settings -> Communication Setup -> SMS Templates.
2) To add a new template click the green plus arrow at the bottom left of the window. To edit an existing template click the yellow edit button next to the template you wish to amend.
3) Enter a Template Name. Please note this is for your reference only, the patient will not see this.
4) Select the merge field you require from the list on the right hand side. Press Insert Field, to include it in the text message template. Merge fields will automatically insert the patient or practice details in into the text message. For example if you want to merge Mrs Susan Baker’s title and second name into the template you would insert the merge fields ‘Patient_Title’ and ‘Patient_Surname’. The program would then look at the patient record or records you want to merge into the text and automatically fill these details in for you.
5) Once you are happy with the template press save. The window will close and it will show the SMS Template Setup page. If you want to make this your reminder or recall template, toggle the Reminder or Recall star on the template. You may have to scroll across to show the Recall star setting.
6) Close the window using the X at the top right corner to save your changes. Please click here to find out how to send Recalls. Please press here to find out how to send Reminders.


How to make an Email template. If you’ve already setup the template and want to know how to send the Emails go to Sending Recalls, Sending Reminders or Merging Filter List (for sending Emails to a specific group of people).
1) Go to Settings -> Communication Setup -> Email Templates.
3) Enter a Template Name. Please note this is for your reference only, the patient will not see this. Underneath the Template Name enter the subject of the Email. This will be seen by the patient. Add the body of the text in the large text box provided.
4) Select the merge field you require from the list on the right hand side. Press < Insert Field, to include it in the email template. Merge fields will automatically insert the patient or practice details in into the message. For example if you want to merge Mrs Susan Baker’s title and second name into the template you would insert the merge fields ‘Patient_Title’ and ‘Patient_Surname’. The program would then look at the patient record or records you want to merge into the email and automatically fill these details in for you.
5) To add an attachment, click the green plus button on the bottom left and find the attachment you wish to be sent with the email.
6) Once you are happy with the template press save. The window will close and it will show the Email Template Setup page. If you want to make this your reminder or recall template, toggle the Reminder or Recall star on the template. You may have to scroll across to show the Recall star setting.
7) Close the window using the X at the top right corner to save your changes. Please click here to find out how to send Recalls. Please press here to find out how to send Reminders.
How to make a letter template. If you’ve already setup the template and want to know how merge and print the letters go to Sending Recalls, Sending Reminders or Merging Filter List (for printing letters for a specific group of people).
1) Go to Settings -> Communication Setup -> Letter Templates
2) To add a new template click the green plus button at the bottom left of the window. To edit an existing template click the yellow edit button next to the template you wish to amend.
3) Enter a Template Name. Please note this is for your reference only, the patient will not see this.
Do not include the file extension i.e:
Correct: ‘Welcome Letter’
Incorrect: ‘Welcome Letter.doc’
Once you save the name it will ask you to choose a template to base the new one off. Choose a template such a ‘PracticeTemplate’.
4) Microsoft Word will open. It may not automatically show on your screen. Click the flashing Word icon at the bottom of the screen to view the template. Amend the template as needed.
5) In the toolbar at the top of Word go to Mailings-> Insert Merge Field to select the merge field you require from the list. Merge fields will automatically insert the patient or practice details in into the message.
For example if you want to merge Mrs Susan Baker’s title and second name into the template you would insert the merge fields ‘Patient_Title’ and ‘Patient_Surname’. The program would then look at the patient record or records you want to merge into the letter and automatically fill these details in for you.
6) Save the template as you would a normal Word document. Close it down and it will show in your Patient MailMerge window in Pearl. You can now merge patient details to it.
7) If you want to make this your reminder or recall template, toggle the Reminder or Recall star on the template. You may have to scroll across to show the Recall star setting.
The check-in screen not only allows you to view which patients have appointments on a specific day, it can also indicate who has arrived, is in treatment, or has left the practice.
Check-in Screen
1) To access the check-in page, we click the ‘check-in’ button located under patient search and view patient record.
2) This page will display each appointment and their current status.
3) From the practice diary page, you can edit each patient’s appointment status by simply right clicking the appointment and selecting either arrived, in-treatment or has left.
This button can move the patient ahead either to arrived, in treatment or left.
This button allows you to move the patient back.
This button can allow you to open that patients record page.
4) Each tick indicates the status of the patient in the practice. If you hover over the appointment, it will give you more details of the appointment, including a timestamp.
How to set up appointment types for your practice. This refers to appointment type names like Exam, Crown Fit etc, appointment length, colour, who the appointment applies to and if it requires supervision.
1. Select the ‘Settings‘ button in the top left of the screen.
2. Select ‘Appointments Setup’ and click on the ‘Appointments Type Setup’ button.
3. A box will appear on the screen. From this screen, you are able to order the appointments in an order that suits your practice needs. You are also able to sort the list alphabetically or most used us the two buttons at the bottom of the window. To edit an existing appointment type, select the yellow edit icon next to it and to delete press the red X.
4. To create a new appointment type, select the green plus sign in the bottom right. It will open a new window.
5. To create an new appointment type. Enter a description in the ‘Appointment Description‘ field, apply an appointment length, colour as well as who the appointment type applies too.
6. On the right side of the box is the ‘Reserved Item Types’. These item types allow you to specify when you are able to book certain types of appointments. You can see in this example, Crown fit is bookable in the Emergency, Staff meeting and Private Patients Only slots.
7. You can set the appointment to have a supervisor if needed. Select the tick box to turn this on, then select from the dropdown menu the required time that the supervisor needs. Finally, select the section of the appointment in which the supervisor must be present.
Notes: Be aware that by creating an appointment with a supervisor, it will create an appointment with the allocated time with the dentist. It will also create an appointment with the supervisor, using the supervised time required.
8. Once you have created/edited an appointment type, select the save button (the floppy disk) in the bottom right.
Notes: If you make any changes to the colour of an appointment or its description these won’t take effect on any existing appointments. You can run the “Update Appointment Colours” tool which changes all the appointments of that description to the new colour. This means if you’ve changed the name of an appointment you won’t be able to update the existing appointments descriptions or colours
The appointment lengths available are based on the set minimum appointment slot set in the practice settings.
How to create and book in a Planned Appointment. These can be created in surgery in preparation for a Patient’s next visit.
1. To add a planned appointment select Planned on the Appointments filter at the top of the screen, a button called Add Planned Appointment will appear.
2. Next enter the relevant details. The planned appointment can be edited later if any changes need to be made. Here you can also specify a waiting list which can be tracked and used to book when you’re viewing that specific waiting list.
3. Now we can book the planned appointment. This can be done multiple ways:
a. Booking an appointment manually: If the criteria match (the start date for the appointment is after the ‘book after date’, same staff member and duration space) then the planned appointment will be automatically filled in for you.
b. If you’ve already found space in the diary the planned appointment can be drag and dropped straight into the diary slot from the filtered list.
c. Double clicking on the planned appointment in the filtered list will open up our useful find a slot utility.
The Find a Slot utility can search through busy diaries to find available time in the diary. As this has been done from a planned appointment, it will automatically load in all the appointment details. For example the practitioner, appointment length, and the earliest date it can be booked.
Selecting a slot from the list will automatically go to that available slot in the diary screen and highlight it clearly for you to book the planned appointment into.


Please watch our video below showing off how Planned appointments can be utilised in Pearl.