Payment Plans
A guide on how to set up payment plans for patients.
1. Go to the patients record and select the ‘Accounts‘ tab.

2. Select the ‘Payment Plans‘ button in the bottom left, a new window will pop up.
3. In this window you are able to view all payments plans that exist for the current patient and all related transactions.

4. Select the green plus button in the bottom right to add a new plan. A new window will pop up. In this window, you are able to add all the neccessary details on the left side of the screen. Start with the description of the payment plan, for example ‘Braces’. Next the total cost of the treatment, then staff member carrying out the treatment, if it has an initial fee (such as deposit), the first payment date and a transaction note.

5. You can also edit the start dates, change the number of instalments and the frequency of these instalments. The number of instalments will divide up the total into even payments (once initial fee has been deducted if you’re using this function). Then you can set the timed intervals of when you’d like to take the payment from the patient, for example monthly will be once a month.

6. Select the ‘Calculate‘ button when ready to generate the payment plan. All the instalments will appear for you to see. Once you are done, select the save button in the bottom right.
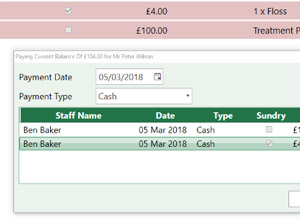
7. You will return the the payment plans screen. From here you are able to view your newly created payment plan. By pressing the ‘Pay Todays Balance‘, you can pay the amount owed for today, whether that is the initial fee, the first instalment or both.
8. Select the appropriate payment type and press the “Pay Balance” button.


